
"From the Vault" features old pieces I wrote for previous projects and employers. This article was originally published on April 9, 2015 in the company website as a developer's log, and has since been archived here. It was intended to introduce game development by using the game I was developing back then as a case study. This article has been expanded for clarity and retains all content from the original publication, including the cheesy greeting.
Sprite and skeletal animation
Hey there Rollers!
Today we’ll have a short post about animation. Mobile games using 2D animation frequently use one of two processes in animating avatars, characters, monsters, and so on. In the old days, the only way was sprite animation. A low-res approximation of a character would be rendered in 16- or 32-bit. Companies varied in how they implemented the sprite, but the general programming techniques were largely the same; minute improvements in programming and hardware paved the way to being able to fit in more sprites for less memory.
Monster Roller, like many modern 2D games, uses the second process. In simple terms, we have a ‘skeleton’ of the character (or monster, for our game) whose parts can be animated separately rather than as a whole. How we define these parts (usually called ‘bones’) and animate them determines how well they move. Fittingly, this kind of animation is called skeletal animation. The process of making all the bones add up to a body is called rigging.
The main advantage skeletal animation has over sprite animation is that once movements are defined, they can be reused across different monsters, and in theory monsters can be frankensteined together from existing parts. In sprite animation, each character regardless of build needs its own sprite, which will require its own running cycle, attacking animation, etc. In skeletal animation, the animation 'recipe' can be reused for different characters; you don't need to reuse the same walking cycle if the body types or bones correspond. The process thus unlocks the game's potential to scale up to make hundreds of monsters despite a team of say, five or six artists. Also, it keeps the build size small.
Rigging templates
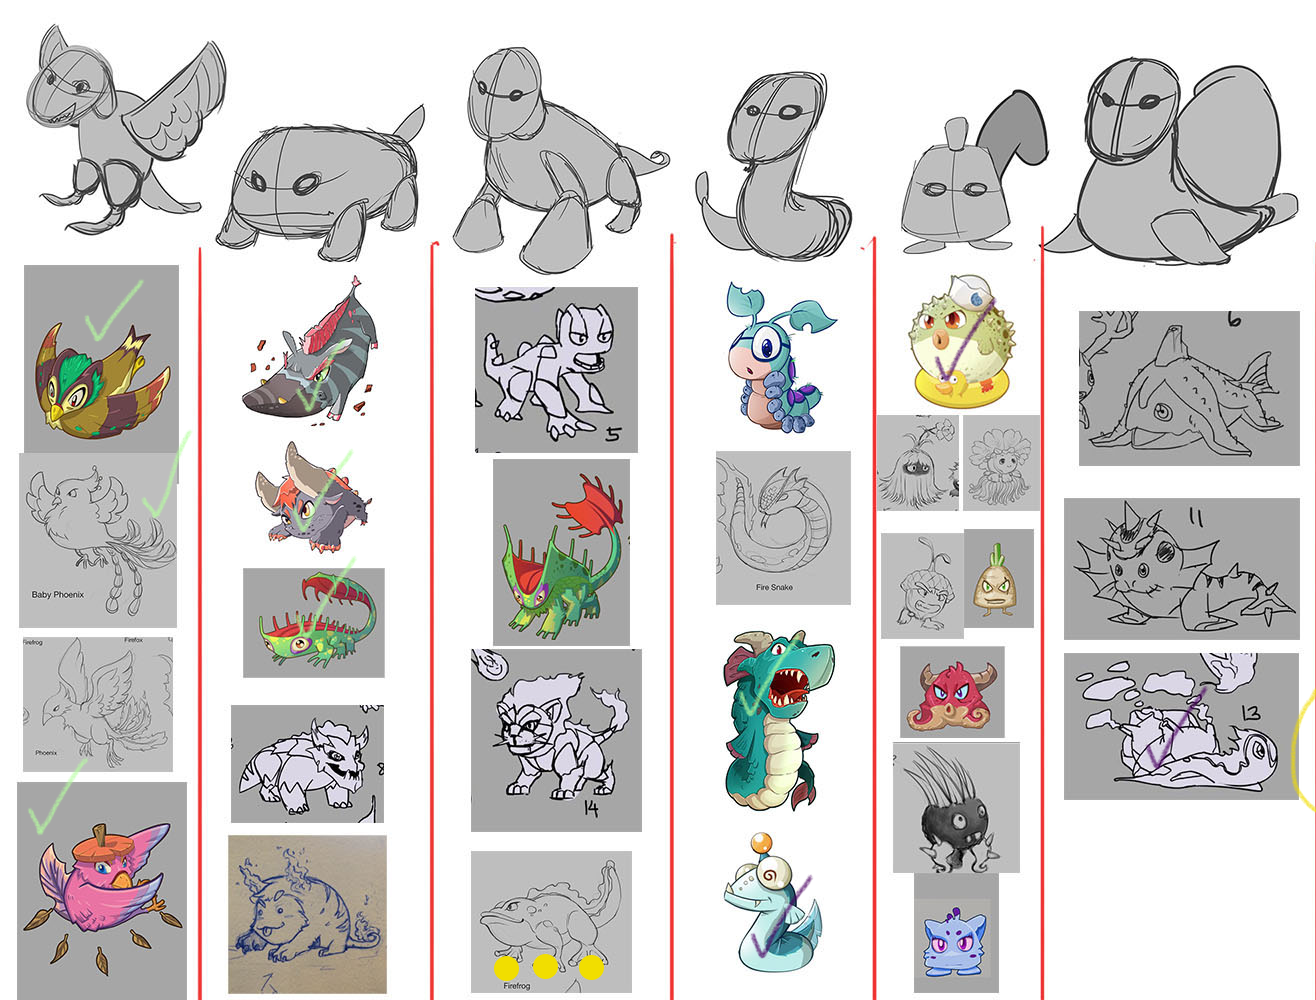
As a simple example, a cat animation will have the body, tail, face, eyes (separated for blinking), and 4 legs. Depending on how complex your animation must be, you can also separate the ears, the joints for the legs, the whiskers, and so on. The code for moving a cat can be reused for other cat-like creatures, such as lions.
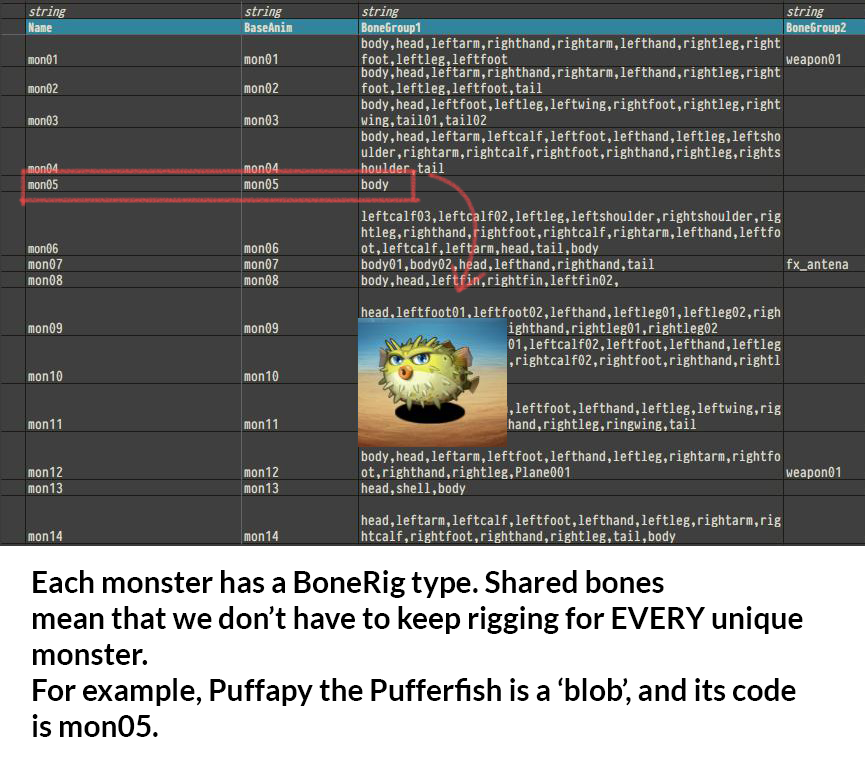
As much as possible we want to reuse rigging templates so that we don’t have to waste time rigging every new monster. In a game with potentially over a hundred monsters, this is very important. So we have to tell the engine ‘This rig is for this monster’. In the picture below, Puffapy’s rig is the simplest one: it only needs a body.
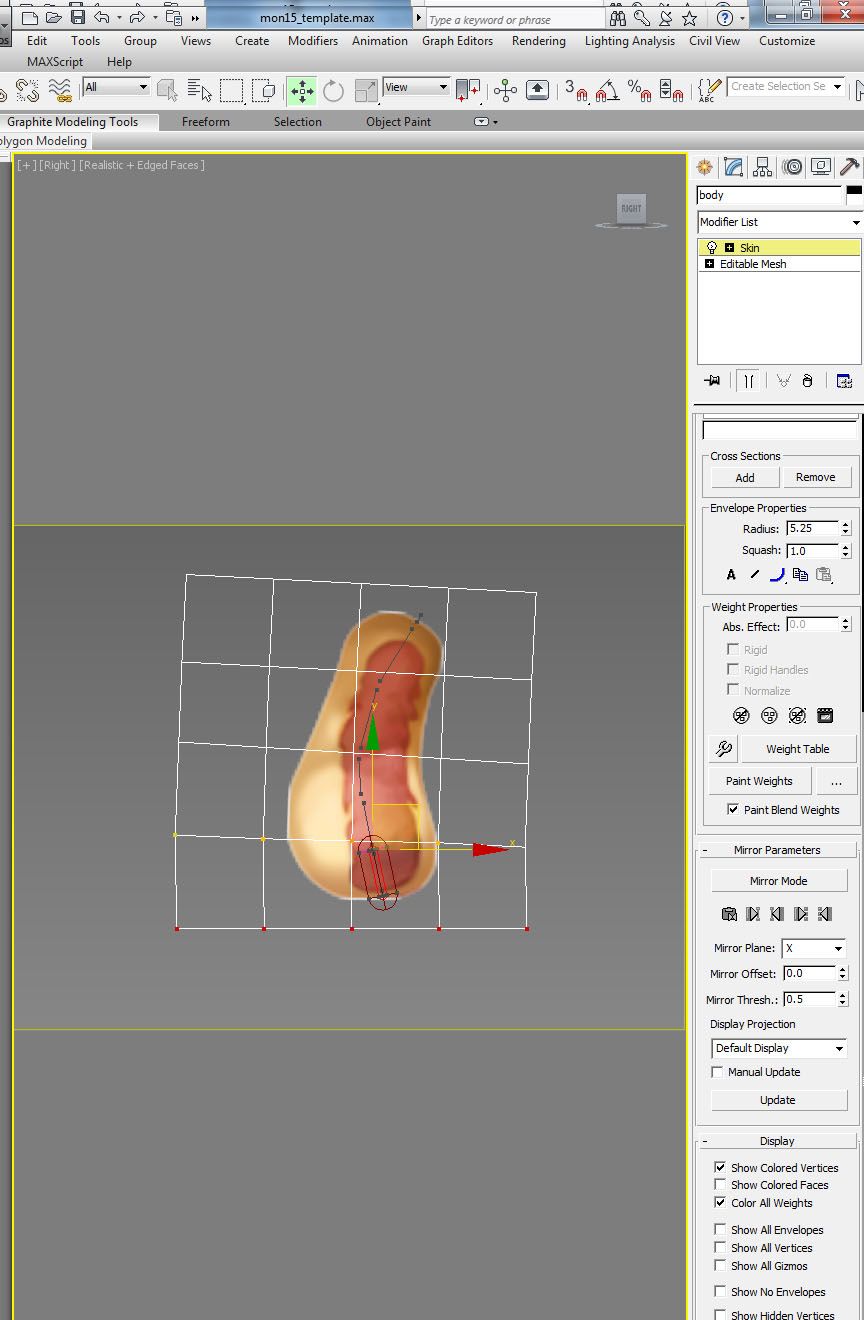
Then in 3DSMax, the animator takes all these cut up assets (provided by the artist). Puffapy has only one bone, so let's look at Lectreel:
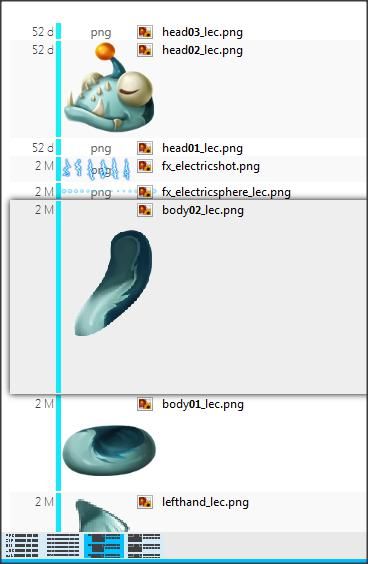
Each part (or bone) has a mesh, which is a polygonal model of the part. Lectreel's design is that of a serpent, so there aren't that many moving parts. Let's look at Womburr, a much more complicated example:
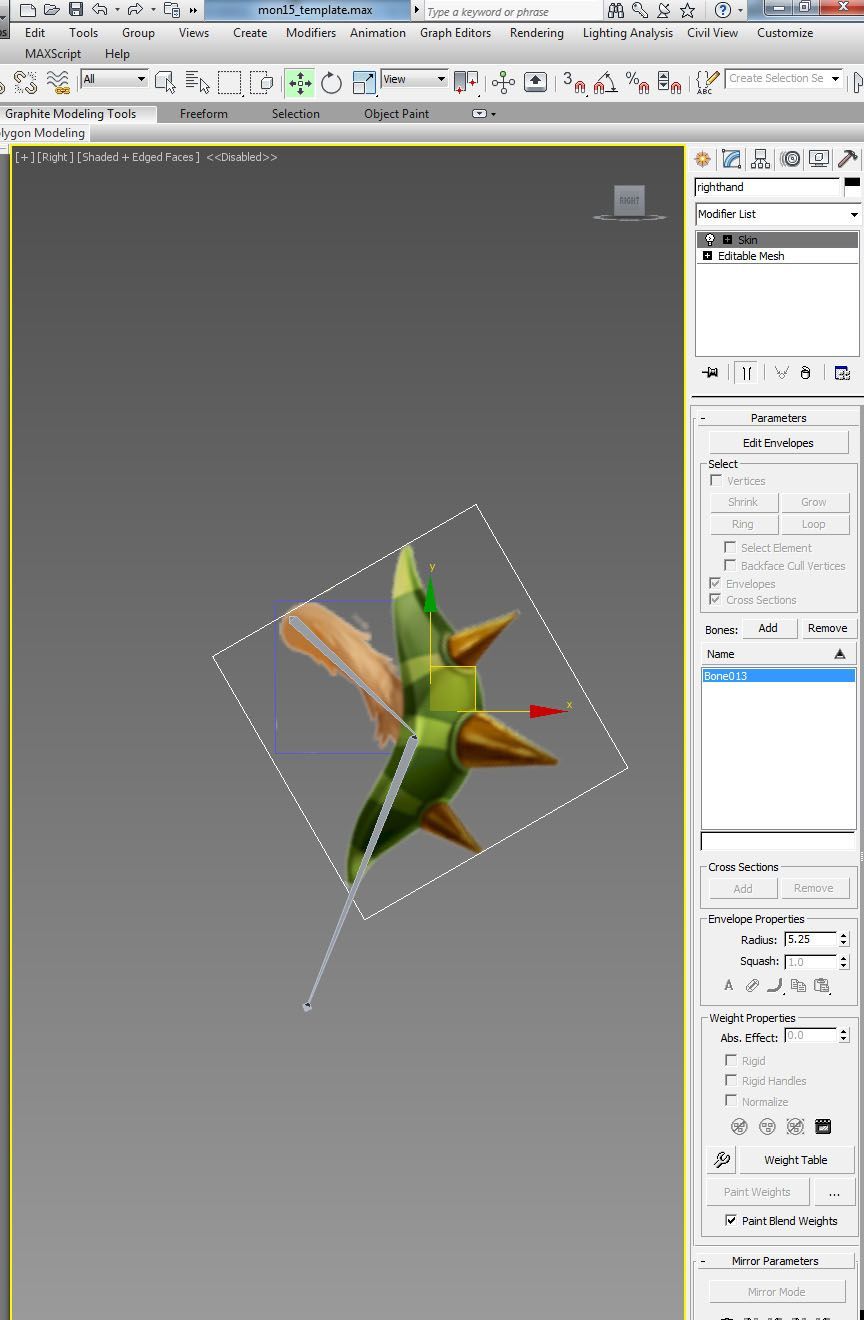
This ‘model’ is needed by the computer in order to interpret HOW to move the part. If you define your mesh well, you will be able to manipulate the part or model to do whatever animation it needs (like breathing, attacking, and so on.) And if you group related monsters close enough in proportion (that's the artist's job), then the animation can be reused with minimal impact to the overall build size. How well something ‘moves’ also depends on what the engine can handle. Our engine supports keyframe animation (usual tweening stuff) and vertex animation. These topics will be discussed in the future, so stay tuned!
Returning to our Womburr, after putting in all the individual parts together, the rigging is almost there:
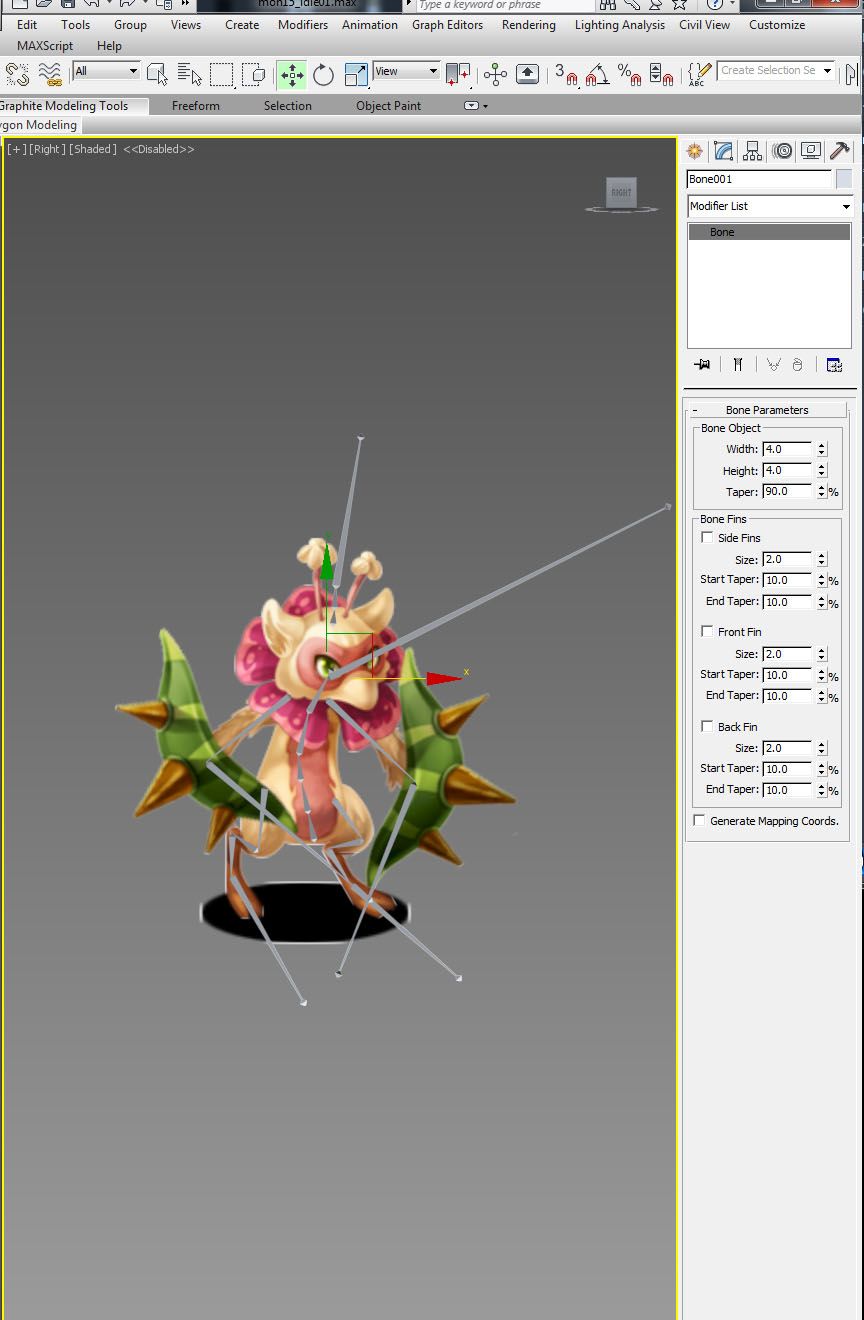
And this is what the final idle animation looks like:

Hope you guys enjoyed this short post on animation. Stay tuned next week for more.

